The following article describes at a medium-high level how to install an R12 Vision Demo environment. Each OS has different pre and post requirements so be sure to read the metalink notes specific for your environment.
The article has two sections, the first lists relevant documentation and Metalink notes. The second section provides installation steps with screenshots of each screen that you will see during the installation process. However, I didn’t detail every pre or post requirement performed because there are differences for various OSes and it could get confusing. I’ll mention the following a few times throughout this article: Make sure you follow the Metalink note for your OS.
Documentation Notes and Links:
Metalink Notes:
Linux x86 402310.1
Linux x86-64 (64-bit) 416305.1
HP-UX Itanium 402307.1
HP-UX PA-RISC 402308.1
IBM AIX 402306.1
Microsoft Windows 402311.1
Sun Solaris SPARC 402312.1
405565.1 – R12 Installation Guidelines. Contains upto date information which may not be included in the Rapid Install Guide.
549389.1 - Oracle Applications Release Notes, Release 12.0.4 – Contains information on latest Rapid Install patch.
Installation Steps:
- Create a user account. I will be using the account oravis which will be a member of the dba group. Some installations use two accounts, applmgr or appl<sid> for the E-Business Suite files and ora<sid> for the database account.
- Review your operating system specific metalink note and verify all OS requirements are met. This document can seem overwhelming if you are new to Oracle/E-Business Suite so take your time and read through it. In most cases, you’ll just need to summarize this note for your system administrator. Some of the key areas are:
- Confirm your operation system is supported.
- Confirm required patches/packages are applied.
- Confirm kernel settings.
- Modifying various configuration files depending on platform. (/etc/hosts, limits.conf, etc..)
Each type of OS has different requirements, so make sure you review the appropriate metalink note (above) If you don’t have a system administrator, feel free to ask me questions. I’ll gladly help as best I can.
- Download R12 from Oracles eDelivery site, http://edelivery.oracle.com. Unzip the files to create your stage directory. You will need about 75GB of space.
Note: You don’t have to download every archive listed. You only need to download upto the documentation files, which for version 12.0.4 is around 26 archives (Solaris version).
- Download the latest Rapid Install patch as described in Note 549389.1. At the time this article was written the latest patch is 6919017. Uncompress this file within your stage directory. Ie.
- $ cd Stage
$ unzip –o p6919017_R12_GENERIC.zip
- $ cd Stage
- Welcome Screen
cd <Stage DIR>/startCD/Disk1/rapidwiz and launch the program rapidwiz:

Click on Next.
NOTE: The Rapid Install Wizard for the unix or linux platform needs access to an X server. If your not executing rapidwiz from a local xterm on the server then you must export your display to a server in which you have X access. I use Hummingbird Exceed so I can view the GUI on my laptop but there are many other options available.
For Exceed there are two ways to do this. The easiest way would be to use Exceeds Client Wizard to create a connection. This will automatically set your DISPLAY properties.
The other option would be to launch Exceed manually, login to your server and set the DISPLAY variable to that of your PC’s IP address.
- Wizard Operation Screen

Select “Use Express Install” and click on Next. When Express Install is selected you will not be prompted for additional information which will allow you to customize the installation. Since this will be used for self training, it’s a perfect start.
- Oracle Configuration Manager

Select Decline followed by the Next button.
- Express Configuration Information
Some of the fields below will be pre-populated. For those that aren’t fill them in.

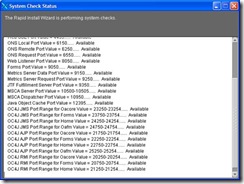
Once you click on Next , Rapid Install Wizard will perform a system check.
- System Check Status
- Pre-Install Checks
Once the system check is complete you will be presented with a summary window. If any of the checks failed you can click on the red X and it will show you why. If all the checks are successful you will see the following screen:
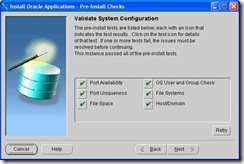
When you click on Next the application will begin to install:

- Post-Install Checks
Once the install is complete the following window will appear. If you see any red X’s, click on them to get more information on the error. If everything was successful you will see the following window:
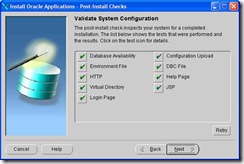
If everything was successful click Next
- Finish
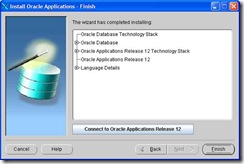
The install is complete. Click on the Finish button to exit the Rapid Install Wizard.
- Verify
You can either click on “Connect to Oracle Applications Release 12” button in step 12 or launch a web browser manually. For the URL enter:
http://<servername>.<domain_name>:<Port number>/OA_HTML/AppsLogin
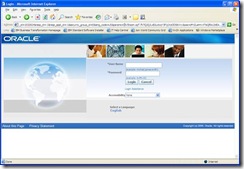
<Port Number> is derived from the Port Pool we choose in Step 8 prefixed by the value 80. Since we choose 50 for the port pool, the port number above would be 8050. The following screenshot is of the login page:
- Post-Install Tasks
Each OS may have different post-installation tasks. For instance, if you installed the Vision Demo environment such as we have above, then you need to submit a concurrent request to build DQM indexes. In the case of Linux (OEL5 REL5), you will have to upgrade the 10.1.3 application server to 10.1.3.3
If you have gotten this far, then you have successfully installed an R12 Vision demo environment. If you have any questions, feel free to ask.
4 comments:
hello
I am stuck at the Post-Install Checks. The it did not pass the 5 check at the bottom (http, jsp, login, virtual directory...)web services some how could not start..
My installation is on Oracle Enterprise Linux x86-64 bit. ver 2.6.18-128.el5xen.
Do you have any idea?Thx a bunch for your help
You most likely need to apply patch 6078836 for OAS. This issue occurs for the R12.1 vision on OEL5/RHEL5
Thanks for the info... This article was written for 12.0.4.. I should have put that in the title or more at the beginning.
HI,THNKS FOR THIS NICE POST,PLZ GIVE STEPS REGARDING MULTINODE INSTALLLATION IN UNIX.
Post a Comment