I haven't been able to update the blog recently... I barely have time to eat at work since Xmas and I don't forsee that changing for the next few weeks. On my list is to build our new test and production Oracle Fusion Middleware environments, install a VISION instance, put together an R12.1.2 upgrade analysis, clone an environment and upgrade it. Plus all the lights on and day to day issues that crop up. I'm hoping tho to have a new series or R12 posts coming out tho in the next few weeks.
Off topic, I have a 1TB external drive built by Comstar. When choosing an external drive the first piece of information I wanted to find out was what kind of hard drives were in it. I can't remember the brand name off hand now (since it was 2 years ago) but I believe it was either a Western Digital or Seagate. The reviews for the drive were good enough for me to buy it.
About a year into it I noticed that I had trouble reading certain files and the drive would get very slow at times. I'm not sure if its just the drive is failing, or it has become corrupted somehow. Within Windows you can configure external drives so that you have to safely remove them or quick disconnect. The trade off is performance, such that write caching is disabled if you want to be able to quickly disconnect it. Even tho I had this option enabled, each time I tried to dismount the drive Windows would complain. I would check task manager but nothing would be accessing files on the drive so I would just power it off. I'm wondering if this caused corruption over time.
This past weekend I bought a 1TB Lacie drive and am in the process of moving all my files off the old drive. After all my files (hopefully) have been moved i'll take a closer look at the drive and see if its recoverable. It may take awhile tho!
Tuesday
Thursday
11g Fusion Middleware Install Walkthrough – Part 4 Portal and SOA Install
Part 4 describes the process to install and configure Portal and SOA on the application tier of the Fusion Middleware Environment.
Overview of the Installation Steps
This is identical to the procedure in Part 2. The Sun JDK and WebLogic server was installed as part of Identity Management on the database tier. Repeat these steps for the Application Tier.
Step 3 – Installing Portal
We created the repository for Portal back in Part 2 so we wouldn’t have to run the repository creation utility multiple times. Unzip the Portal installation media and launch the runInstaller:
Click on the Next button.
As with Identity Management, we are going to Install and Configure the Portal environment, so verify that its selected and click on the Next button.
If you are followed the steps from Part 1 and are using the same versions then the pre-requisite check should be ok. If there are issues here fix them before you proceed. Once everything is ok click on the Next button.
Select a username to administer the domain, a password and the domain name. Click Next when your finished entering this information.
If you would like Oracle Configuration Manager to be installed then enter your metalink email address and password. Click on Next to continue.
Unfortunately this is a bad screenshot as its not showing the end of the Instance Location field. Since we are install Portal and SOA on this tier I want the directory names to be representative. So the Oracle Home directory is preceded with PORTAL, as is the instance location and name. The Middleware Home Location is where you installed the WebLogic Server earlier. Click on Next when your finished.
If your not planning on using all of the components then de-select then ones not required. Here everything is being installed except for Discoverer. Click on Next when ready.
Since this is the first WebLogic domain on this server we can use the Auto Port Configuration option. However, during the SOA install we’ll need to do this differently. I’ll go into detail why at that point. Click on Next.
Click on the Next button.
Enter the connection details for the database and repository created in Step 2. When finished click on the Next button.
Enter the schema name and password for the PORTLET account created as part of the repository install in Step 2. Click on Next when finished.
Enter the details for Oracle Internet Directory created in Part 2. Be sure to use the SSL port. Click on Next when finished.
Save a copy of the response file. It may come in handy if need to reinstall or when creating a new environment. Click on Install when ready.
Once the install has finished it will ask you to run the oracleRoot.sh script:
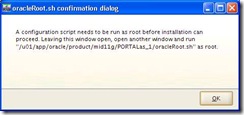
Once you have executed the script as root click OK.
Save a copy of the Installation Summary, it will contain useful information such as where the location of various components on disk, URL’s and port numbers. Click on Finish when complete.
Step 4 – Installing SOA
Unzip the SOA media and change directory to Disk1. Before you start set your JAVA_HOME environment variable and launch the runInstaller with the –jreLoc parameter:
Click on the Next button.
If you are followed the steps from Part 1 and are using the same versions then the pre-requisite check should be ok. If there are issues here fix them before you proceed. Once everything is ok click on the Next button.
Enter the Middleware Home directory, which is the same as the other products installed, and specify a directory name where SOA will be installed. Click on Next when ready.
As with the other products installed, save the response file in case you need to reinstall or setup a new environment. Click on Install when ready.
The installation details file contains some useful information so be sure to save a copy. Click on the Finish button.
Configuration
To configure SOA launch the configuration wizard:
/u01/app/oracle/product/mid11g/SOAHome_1/common/bin
[oracle@vm7 bin]$ ./config.sh
Each component of the Fusion Middleware stack has to be installed in its own domain. So at the end of this installation we’ll have 3 domains over two tiers. An Identity Management domain on the database tier and a Portal Domain and SOA domain on the application tier.
Verify Create a new WebLogic domain is selected and click on the Next button.
On this screen select only the SOA components which are easy to distinguish by the [SOAHome_1] at the end of each option. Click on Next once they have been selected.
Enter the domain information and click on Next.
Specify a username and password to administer this domain.
Select the appropriate startup mode depending on this is a DEV or PROD environment and click on the Next button.
Enter the connection details for the database created in Part 2. If you used the same password for all schemas then enter it in the Schema Password textbox at the top of the screen. If you created the repository with a different password for each schema then you will have to enter each on in the last column of the table. Click on the Next button once your finished.
The configuration utility quickly tests to see if it can connect to each of the schemas. If there are problems here verify the database connection information and passwords you entered are correct. Click on the Next button to continue.
We need to perform some addition configuration steps on this domain so check the first two options Administration Server and Managed Servers, Clusters and Machines and click on the Next button.
Back in Part 1 I listed a known issue where ports are not checke across multiple Oracle Home directories. If you blindly go through the install then the AdminServer for the SOA domain will use port 7001. This port is already in use by the Portal domain. We need to change the port on this screen so there is no conflict. To keep it simple I added 10 to the original port value to et 7011. Click on Next to continue.
As with the AdminServer, the default port for the bam managed server is being used WLS_PORTAL. To keep it consistent I changed both the bam and soa server by adding 10 to the original value to get 9011 and 8011 respectively. Once finished click on the Next button.
Click on Next.
Click on Next.
Click on the Next button.
Review the summary and click on the Create button.
Once the install completes click on the Done button.
If you have gotten this far you will have successfully installed Fusion Middleware 11g.
Overview of the Installation Steps
- Install Sun JDK
- Install WebLogic Server
- Install Portal
- Install SOA
This is identical to the procedure in Part 2. The Sun JDK and WebLogic server was installed as part of Identity Management on the database tier. Repeat these steps for the Application Tier.
Step 3 – Installing Portal
We created the repository for Portal back in Part 2 so we wouldn’t have to run the repository creation utility multiple times. Unzip the Portal installation media and launch the runInstaller:
Click on the Next button.
As with Identity Management, we are going to Install and Configure the Portal environment, so verify that its selected and click on the Next button.
If you are followed the steps from Part 1 and are using the same versions then the pre-requisite check should be ok. If there are issues here fix them before you proceed. Once everything is ok click on the Next button.
Select a username to administer the domain, a password and the domain name. Click Next when your finished entering this information.
If you would like Oracle Configuration Manager to be installed then enter your metalink email address and password. Click on Next to continue.
Unfortunately this is a bad screenshot as its not showing the end of the Instance Location field. Since we are install Portal and SOA on this tier I want the directory names to be representative. So the Oracle Home directory is preceded with PORTAL, as is the instance location and name. The Middleware Home Location is where you installed the WebLogic Server earlier. Click on Next when your finished.
If your not planning on using all of the components then de-select then ones not required. Here everything is being installed except for Discoverer. Click on Next when ready.
Since this is the first WebLogic domain on this server we can use the Auto Port Configuration option. However, during the SOA install we’ll need to do this differently. I’ll go into detail why at that point. Click on Next.
Click on the Next button.
Enter the connection details for the database and repository created in Step 2. When finished click on the Next button.
Enter the schema name and password for the PORTLET account created as part of the repository install in Step 2. Click on Next when finished.
Enter the details for Oracle Internet Directory created in Part 2. Be sure to use the SSL port. Click on Next when finished.
Save a copy of the response file. It may come in handy if need to reinstall or when creating a new environment. Click on Install when ready.
Once the install has finished it will ask you to run the oracleRoot.sh script:
Once you have executed the script as root click OK.
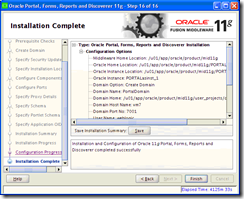
Save a copy of the Installation Summary, it will contain useful information such as where the location of various components on disk, URL’s and port numbers. Click on Finish when complete.
Step 4 – Installing SOA
Unzip the SOA media and change directory to Disk1. Before you start set your JAVA_HOME environment variable and launch the runInstaller with the –jreLoc parameter:
[oracle@vm7 Disk1]$ JAVA_HOME=/u01/app/oracle/product/jdk1.6.0_16; export JAVA_HOME
[oracle@vm7 Disk1]$ ./runInstaller -jreLoc $JAVA_HOME
Click on the Next button.
If you are followed the steps from Part 1 and are using the same versions then the pre-requisite check should be ok. If there are issues here fix them before you proceed. Once everything is ok click on the Next button.
Enter the Middleware Home directory, which is the same as the other products installed, and specify a directory name where SOA will be installed. Click on Next when ready.
As with the other products installed, save the response file in case you need to reinstall or setup a new environment. Click on Install when ready.
The installation details file contains some useful information so be sure to save a copy. Click on the Finish button.
Configuration
To configure SOA launch the configuration wizard:
/u01/app/oracle/product/mid11g/SOAHome_1/common/bin
[oracle@vm7 bin]$ ./config.sh
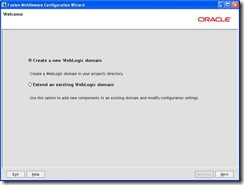
Each component of the Fusion Middleware stack has to be installed in its own domain. So at the end of this installation we’ll have 3 domains over two tiers. An Identity Management domain on the database tier and a Portal Domain and SOA domain on the application tier.
Verify Create a new WebLogic domain is selected and click on the Next button.
On this screen select only the SOA components which are easy to distinguish by the [SOAHome_1] at the end of each option. Click on Next once they have been selected.
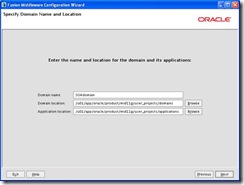
Enter the domain information and click on Next.
Specify a username and password to administer this domain.
Select the appropriate startup mode depending on this is a DEV or PROD environment and click on the Next button.
Enter the connection details for the database created in Part 2. If you used the same password for all schemas then enter it in the Schema Password textbox at the top of the screen. If you created the repository with a different password for each schema then you will have to enter each on in the last column of the table. Click on the Next button once your finished.
The configuration utility quickly tests to see if it can connect to each of the schemas. If there are problems here verify the database connection information and passwords you entered are correct. Click on the Next button to continue.
We need to perform some addition configuration steps on this domain so check the first two options Administration Server and Managed Servers, Clusters and Machines and click on the Next button.
Back in Part 1 I listed a known issue where ports are not checke across multiple Oracle Home directories. If you blindly go through the install then the AdminServer for the SOA domain will use port 7001. This port is already in use by the Portal domain. We need to change the port on this screen so there is no conflict. To keep it simple I added 10 to the original port value to et 7011. Click on Next to continue.
As with the AdminServer, the default port for the bam managed server is being used WLS_PORTAL. To keep it consistent I changed both the bam and soa server by adding 10 to the original value to get 9011 and 8011 respectively. Once finished click on the Next button.
Click on Next.
Click on Next.
Click on the Next button.
Review the summary and click on the Create button.
Once the install completes click on the Done button.
If you have gotten this far you will have successfully installed Fusion Middleware 11g.
Labels:
Fusion Middleware,
Installation Guides
Sunday
Fusion Middleware – PermGen memory issues
The other day a developer called me to say that the Fusion Middleware console was spinning. A quick look at the the environment showed a java process consuming 100% of a cpu and in the AdminServer weblogic log there was the following error:
java.lang.OutOfMemoryError: PermGen space
To get the environment going again I had to kill the java process and restart the AdminServer. I increased the amount of PermGen memory and so far it hasn’t happened again.
To change the PermGen memory login to the WebLogic Administration Console:
After you login click on Lock & Edit, so you can make changes. Followed by Environment -> Servers under the Domain Structures widget. The right hand side of the screen will update. Click on the AdminServer(admin) link in the table:
Verify that the Configuration tab is selected and click on Server Start:
Scroll down until you see an Arguments text box and update the PermSize and MaxPermSize to the new values. In my example below I have already modified them to be twice their original value:

Once you have made the changes scroll back up to the top of the page and click on the Save button:
Click on the Activate Changes button:
As you can see below, the changes were saved successfully and it says no restarts are necessary. Since we updated the startup parameters tho, they will not come into affect until you perform a restart.

If you want to check out your changes on the server side, login to the server hosting your Portal domain. Change directory to your $PORTAL_DOMAIN/config directory and view the config.xml file. A backup of the config.xml file can be found at $PORTAL_DOMAIN/servers/domain_bak/config_prev/config.xml
From within the WebLogic console, the monitoring capabilities seem to be rather limited.
For example:
From the Fusion Middleware control console I see:

And from the WebLogic Administration Console (Server-> Monitoring -> Performance tab) I can see:
Now, I am very new to WebLogic, so there may be other areas to see more detailed information or a way to start recording it. I have it on my list to investigate further.
If you have Grid Control and the WebLogic management pack there are lots of performance metrics you can view and drill down into.
Lets say you don’t have Oracle Grid Control and would like to confirm the PermGen changes we made above or take a closer took at performance. There are a number of tools available and one of them, VisualVM is packaged with the Sun JDK.
To launch VisualVM go to your JDK_HOME/bin directory and launch jvisualvm. The first time you launch this tool there is a calibration that needs to occur.
When it finishes you’ll be presented with some statistics. After you click OK and the application starts you will see a screen similar to:

The tool automatically discovers the java processes. If you don’t see any here, or not as many as you expect there could be a number of reasons. From the VisualVM documentation:
The circumstances in which VisualVM will not automatically discover JMX agents, and thus the Java applications they expose, are the following:

If I go back to VisualVM, find process id 32508 in the list and double click on it I see:

Take a look at the red circle. Wait?! It still says that the PermSize is 128 and MaxPermSize is 256m.
It turns out that the procedure I used above to change the PermSize settings, which modifies the config.xml file will only work if you are using a Node Manager to start the servers.
If you are using the startWebLogic.sh and startManagedWebLogic.sh scripts to start up the AdminServer and managed servers respectively, then you will need to modify those scripts.
Since I am modifying the Java parameters for the AdminServer the script we need to modify is startWebLogic.sh. However, startWebLogic.sh calls a script called setDomainEnv.sh. This script initializes a number of variables, but the one we are looking for is EXTRA_JAVA_PROPERTIES.
This parameter will be modified multiple times, so it can be confusing as to which one to modify. Here is a clip:
The parameter we want to modify is the first one. The second one is actually Java parameters for the Reports manager server. Further down in the file you will see sections for the other managed servers in the Portal environment, such as Forms and Portal. Modify the first EXTRA_JAVA_PROPERTIES PermSize settings:
EXTRA_JAVA_PROPERTIES=" -Xms512m -Xmx1024m -XX:PermSize=256m -XX:MaxPermSize=512m -Doracle.home=/u01/app/oracle/product/mid11g/PORTALas_1 -Ddomain.home=/u01/app/oracle/product/mid11g/user_projects/domains/PortalDomain ${EXTRA_JAVA_PROPERTIES}"
After a restart of the AdminServer and viewing the java process in VisualVM we see:

We have now confirmed the changes have been made successfully. If you notice 9 lines above my circle there is another MaxPermSize entry. I believe that one is being captured by the variable:
MEM_MAX_PERM_SIZE_32BIT="-XX:MaxPermSize=512m"
export MEM_MAX_PERM_SIZE_32BIT
I am not sure what happens in a case where a parameter is specified twice with different values. Does the second one override the first? Is it the one with the maximum value? I’ll tell you what I think in a second.
If you click on the Monitor tab->PermGen you will see the following:
This screen provides you with more information about the state of the java process such as the PermGen memory area. As you can see the size is around 256M and currently the WebLogic process is only using around 175M.
To test what happens when a parameter is specified twice, I put another –XXPermSize before the one in the JAVA_EXTRA_OPTIONS variable and tried a few test scenarios. I set the first to 128m and the second to 256m. When I looked at the PermGen memory in VisualVM the size was around 256. Then I swapped the parameters and restarted the server again. This time the PermGen size was 128m (the value of the second parameter). So it looks like if a parameter is specified twice the last occurrence is used.
java.lang.OutOfMemoryError: PermGen space
To get the environment going again I had to kill the java process and restart the AdminServer. I increased the amount of PermGen memory and so far it hasn’t happened again.
To change the PermGen memory login to the WebLogic Administration Console:
After you login click on Lock & Edit, so you can make changes. Followed by Environment -> Servers under the Domain Structures widget. The right hand side of the screen will update. Click on the AdminServer(admin) link in the table:
Verify that the Configuration tab is selected and click on Server Start:
Scroll down until you see an Arguments text box and update the PermSize and MaxPermSize to the new values. In my example below I have already modified them to be twice their original value:
Once you have made the changes scroll back up to the top of the page and click on the Save button:
Click on the Activate Changes button:
As you can see below, the changes were saved successfully and it says no restarts are necessary. Since we updated the startup parameters tho, they will not come into affect until you perform a restart.
If you want to check out your changes on the server side, login to the server hosting your Portal domain. Change directory to your $PORTAL_DOMAIN/config directory and view the config.xml file. A backup of the config.xml file can be found at $PORTAL_DOMAIN/servers/domain_bak/config_prev/config.xml
From within the WebLogic console, the monitoring capabilities seem to be rather limited.
For example:
From the Fusion Middleware control console I see:
And from the WebLogic Administration Console (Server-> Monitoring -> Performance tab) I can see:
Now, I am very new to WebLogic, so there may be other areas to see more detailed information or a way to start recording it. I have it on my list to investigate further.
If you have Grid Control and the WebLogic management pack there are lots of performance metrics you can view and drill down into.
Lets say you don’t have Oracle Grid Control and would like to confirm the PermGen changes we made above or take a closer took at performance. There are a number of tools available and one of them, VisualVM is packaged with the Sun JDK.
To launch VisualVM go to your JDK_HOME/bin directory and launch jvisualvm. The first time you launch this tool there is a calibration that needs to occur.
When it finishes you’ll be presented with some statistics. After you click OK and the application starts you will see a screen similar to:
The tool automatically discovers the java processes. If you don’t see any here, or not as many as you expect there could be a number of reasons. From the VisualVM documentation:
The circumstances in which VisualVM will not automatically discover JMX agents, and thus the Java applications they expose, are the following:
- The target application is running on the J2SE 5.0 platform and the -Dcom.sun.management.jmxremote* properties have not been specified.
- The target application is running on the same host as VisualVM but was started by a different user than the one who started VisualVM. VisualVM discovers running applications using the jps tool, which can only discover Java applications started by the same user as the one who starts the VisualVM tool.
- The target application is running on a remote host where jstatd is not running or is running but was started by a different user. The jstatd daemon provides an interface that allows remote monitoring applications to connect to Java applications on the host where it is running.
If I go back to VisualVM, find process id 32508 in the list and double click on it I see:
Take a look at the red circle. Wait?! It still says that the PermSize is 128 and MaxPermSize is 256m.
It turns out that the procedure I used above to change the PermSize settings, which modifies the config.xml file will only work if you are using a Node Manager to start the servers.
If you are using the startWebLogic.sh and startManagedWebLogic.sh scripts to start up the AdminServer and managed servers respectively, then you will need to modify those scripts.
Since I am modifying the Java parameters for the AdminServer the script we need to modify is startWebLogic.sh. However, startWebLogic.sh calls a script called setDomainEnv.sh. This script initializes a number of variables, but the one we are looking for is EXTRA_JAVA_PROPERTIES.
This parameter will be modified multiple times, so it can be confusing as to which one to modify. Here is a clip:
----[clip]----
EXTRA_JAVA_PROPERTIES=" -Xms512m -Xmx1024m -XX:PermSize=128m -XX:MaxPermSize=256m -Doracle.home=/u01/app/oracle/product/mid11g/PORTALas_1 -Ddomain.home=/u01/app/oracle/product/mid11g/user_projects/domains/PortalDomain ${EXTRA_JAVA_PROPERTIES}"
export EXTRA_JAVA_PROPERTIES
EXTRA_JAVA_PROPERTIES=" -Xms512m -Xmx1024m -XX:PermSize=128m -XX:MaxPermSize=256m -Doracle.home=/u01/app/oracle/product/mid11g/PORTALas_1 -Ddomain.home=/u01/app/oracle/product/mid11g/user_projects/domains/PortalDomain ${EXTRA_JAVA_PROPERTIES}"
export EXTRA_JAVA_PROPERTIES
if [ "${SERVER_NAME}" = "WLS_REPORTS" ] ; then
EXTRA_JAVA_PROPERTIES="-Xms256m -Xmx512m -XX:PermSize=256m -XX:MaxPermSize=512m -Djava.library.path=/tmp/
---[clip]----
EXTRA_JAVA_PROPERTIES="-Xms256m -Xmx512m -XX:PermSize=256m -XX:MaxPermSize=512m -Djava.library.path=/tmp/
---[clip]----
The parameter we want to modify is the first one. The second one is actually Java parameters for the Reports manager server. Further down in the file you will see sections for the other managed servers in the Portal environment, such as Forms and Portal. Modify the first EXTRA_JAVA_PROPERTIES PermSize settings:
EXTRA_JAVA_PROPERTIES=" -Xms512m -Xmx1024m -XX:PermSize=256m -XX:MaxPermSize=512m -Doracle.home=/u01/app/oracle/product/mid11g/PORTALas_1 -Ddomain.home=/u01/app/oracle/product/mid11g/user_projects/domains/PortalDomain ${EXTRA_JAVA_PROPERTIES}"
After a restart of the AdminServer and viewing the java process in VisualVM we see:
We have now confirmed the changes have been made successfully. If you notice 9 lines above my circle there is another MaxPermSize entry. I believe that one is being captured by the variable:
MEM_MAX_PERM_SIZE_32BIT="-XX:MaxPermSize=512m"
export MEM_MAX_PERM_SIZE_32BIT
I am not sure what happens in a case where a parameter is specified twice with different values. Does the second one override the first? Is it the one with the maximum value? I’ll tell you what I think in a second.
If you click on the Monitor tab->PermGen you will see the following:
This screen provides you with more information about the state of the java process such as the PermGen memory area. As you can see the size is around 256M and currently the WebLogic process is only using around 175M.
To test what happens when a parameter is specified twice, I put another –XXPermSize before the one in the JAVA_EXTRA_OPTIONS variable and tried a few test scenarios. I set the first to 128m and the second to 256m. When I looked at the PermGen memory in VisualVM the size was around 256. Then I swapped the parameters and restarted the server again. This time the PermGen size was 128m (the value of the second parameter). So it looks like if a parameter is specified twice the last occurrence is used.
Labels:
Fusion Middleware
Subscribe to:
Posts (Atom)
